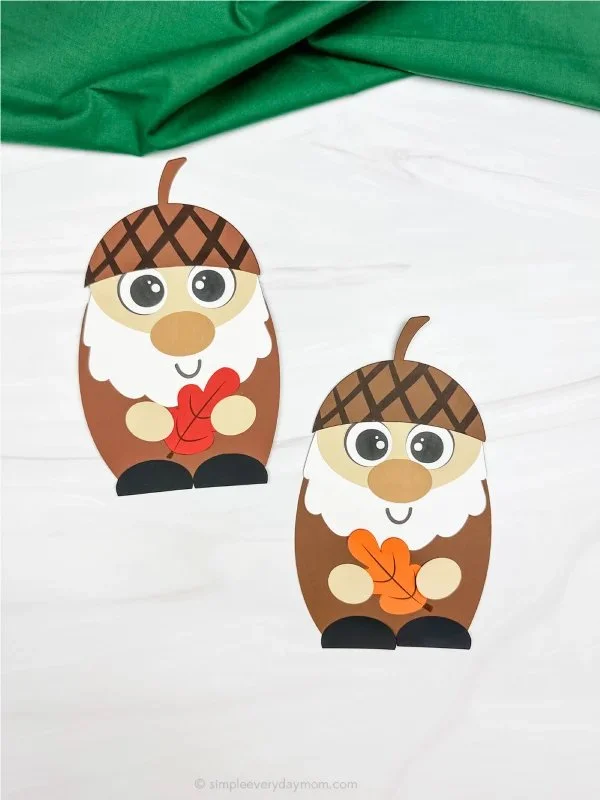
Acorn Gnome Craft For Kids [Free Template] is a fantastic easy DIY project that brings joy to children and adults alike. This creative DIY can be made using simple materials, making it a perfect choice for beginners looking for fun and budget-friendly crafts. With the provided template, making these lovely acorn gnomes will be an enjoyable task that adds a whimsical touch to your DIY home decor, seasonal decorations, and holiday celebrations.
WHY YOU WILL LOVE THIS Acorn Gnome Craft
If you’re looking for an easy craft that sparks creativity and can be made with minimal materials, then the Acorn Gnome Craft is just for you! Here are some reasons why you will enjoy making this handmade gift:
- Easy for beginners: This project is perfect for kids and novice crafters, ensuring a fun and stress-free experience.
- Uses simple materials: You don’t have to hunt for complicated tools or supplies. Most of what you need may already be in your craft box.
- Budget-friendly: This DIY project is cost-effective, making it accessible for families looking to get creative on a budget.
- Quick to make: The Acorn Gnome can be completed in under an hour, perfect for after-school crafting sessions or weekend playdates.
- Great for home decor and gifts: These charming gnomes add a touch of whimsy to your home or make delightful handmade gifts for friends and family.
- Perfect for seasonal decorating: Whether it’s autumn or winter, these gnomes will fit perfectly into your seasonal themes.
PROJECT DETAILS
Here are the essential details for your Acorn Gnome Craft:
Skill Level
This project is beginner-friendly and suitable for children, as well as those new to crafting.
Estimated Time
You can complete the gnome in approximately 30-45 minutes, depending on your crafting pace.
Approximate Cost
The materials needed for this project are generally inexpensive, usually costing around $5-$10 if you need to purchase everything.
Best For
This craft is enjoyable for kids and is suitable for group activities, parties, or family crafting time.
Project Type
This project is categorized under simple crafts, making it a perfect DIY project for beginners.
TOOLS AND EQUIPMENT NEEDED
Here’s what you need to successfully create your Acorn Gnome:
Scissors
You will need scissors to cut out the template pieces and any additional decorations you may want to add to your gnome.
Glue
A strong craft glue or a glue stick should be used to secure the parts of your gnome together.
Paintbrush
A paintbrush may be necessary if you choose to paint any of your gnome’s accessories, adding a fun element to the project.
MATERIALS
Gather the following materials to get started on your Acorn Gnome Craft:
Acorn Caps
These will serve as the gnomes’ hats, giving them a unique look. Acorn caps are readily available outside and can be collected during the fall.
Felt
Felt is great for creating gnome bodies and facial features. You can use different colors to customize each gnome.
Small Wooden Balls
These serve as gnome heads. You can find these in craft stores.
Googly Eyes
Add googly eyes to give your gnome character and whimsy.
Twine or String
Twine can be used to create a rustic necktie for your gnome.
Template Printout
Utilize the provided free template, which can be printed on plain paper for additional shapes or details.
![Acorn Gnome Craft For Kids [Free Template]](https://cdn.contai.io/public/fal-ai-generated/1789832326_6aaeac86ea221.png)
HOW TO MAKE Acorn Gnome Craft
Follow these easy steps to create your Acorn Gnome Craft, ensuring a fun time crafting:
Step 1: Gather Your Materials
Before you start, ensure that you have all your materials and tools on hand. Gather the acorn caps, felt, wooden balls, and googly eyes.
Step 2: Cut Out Your Template
Using the scissors, carefully cut out the template pieces if you are using them. This may include the gnome’s body and any facial features you plan to use.
Step 3: Create the Gnome Body
Cut a piece of felt in the shape of an oval or the desired gnome body shape. This will be the base of your gnome. Customize it with decorations, like a felt vest.
Step 4: Attach the Head
Glue the small wooden ball on the top of the gnome body. This is where the gnome’s face will be.
Step 5: Add the Face
Using the googly eyes, glue them onto the wooden ball to create the eyes. You can also draw a simple smile with a marker.
Step 6: Use the Acorn Cap
Place the acorn cap on top of the wooden ball to form the gnome’s hat. Secure it with glue if necessary.
Step 7: Embellish
Feel free to embellish your gnome with twine for the neck or other fabric pieces you have. You can also add decorative items like buttons or beads.
Step 8: Let It Dry
Allow your gnome to dry completely before displaying or gifting. This will help the glue set properly.
TIPS AND TRICKS
- Choosing materials: When selecting felt, opt for thicker pieces that can withstand handling.
- Gluing: Apply glue sparingly to avoid mess. For small items, use a toothpick to apply glue more precisely.
- Avoid common mistakes: Make sure the googly eyes are placed evenly to maintain a balanced look.
- Saving money: Use upcycled materials, like fabric scraps or leftover craft items, to keep costs down.
- Making the craft last longer: Once finished, consider using a clear spray sealant for added durability if plan on displaying them long-term.
- Safety: Always supervise young children while using scissors or glue.
VARIATIONS AND CUSTOMIZATION IDEAS
Make your Acorn Gnome unique by customizing it in different ways:
- Different colors: Choose various felt colors for the gnome bodies to match different seasons or personal preferences.
- Different sizes: Use larger or smaller acorn caps and wooden balls to create gnomes of varying sizes.
- Seasonal versions: Decorate gnomes differently for seasons, like adding scarves for winter or flowers for spring.
- Personalized versions: Write the name of a recipient or a special message on the gnome’s body for personalized gifts.
- Different materials: Experiment with fabric like cotton or linen for the body instead of felt.
![Acorn Gnome Craft For Kids [Free Template]](https://cdn.contai.io/public/original_images/WmZD8JSEUuRRgizy9pQZiv95wNQwiJFylWo8kxSL.jpg)
Acorn Gnome Craft FAQ
Q1: How challenging is this Acorn Gnome Craft?
This craft is beginner-friendly and simple, making it suitable for kids and those new to crafting.
Q2: What materials do I need for this project?
You will need acorn caps, felt, small wooden balls, googly eyes, twine, glue, a paintbrush, and your free template.
Q3: How should I store my finished gnomes?
Store your gnomes in a cool, dry place. You can keep them in a cardboard box or a decorative basket to prevent damage.
Q4: Can I wash my Acorn Gnome Craft?
To clean your gnome, gently dust with a soft cloth. Avoid directly washing with water as it may damage the materials.
Q5: How long will it take to make my gnome?
The Acorn Gnome Craft can usually be completed in about 30-45 minutes, depending on your crafting speed.
CONCLUSION
Creating your Acorn Gnome Craft is a fun and easy DIY project that is perfect for kids and beginners alike. Its simplicity, affordability, and customization options make it a delightful addition to any crafting repertoire. Plus, you end up with charming seasonal decor or a lovely handmade gift to cherish!
So gather your materials and enjoy this cozy craft. Don’t forget to share your gnome-making experience or any unique customization ideas you come up with!