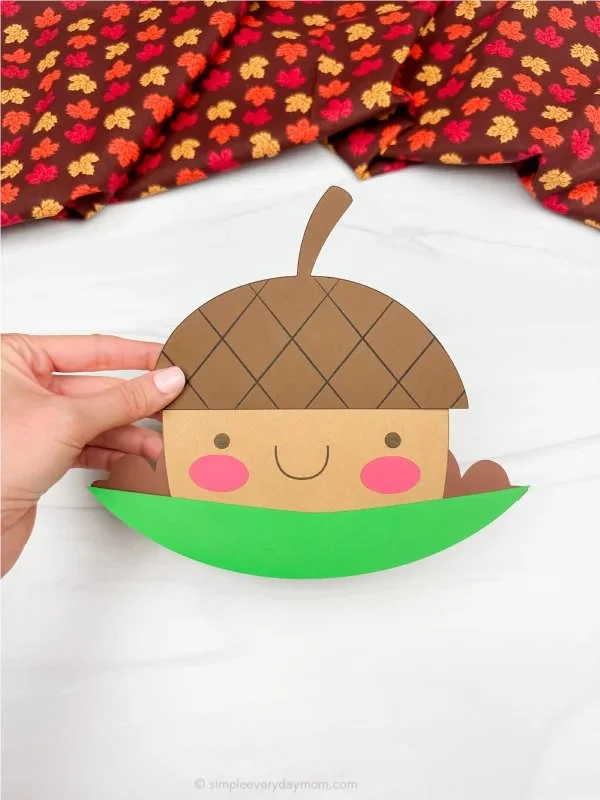
If you’re looking for a delightful and simple craft project for kids, the Little Acorn Craft is a perfect choice! This easy DIY project utilizes basic materials to create adorable little acorn decorations. Perfect for any time of the year, this craft can be customized and is budget-friendly. It also introduces children to the world of DIY crafts, making it an excellent option for beginners.
WHY YOU WILL LOVE THIS Little Acorn Craft
Creating the Little Acorn Craft is an enjoyable experience for children and adults alike. Here are some reasons why this project is a great pick for your next DIY activity:
- Easy for Beginners: This craft doesn’t require any complicated techniques; even young kids can partake in the fun with adult supervision.
- Uses Simple Materials: You can find most of the materials around your home or very cheaply at craft stores, making it an ideal budget-friendly DIY project.
- Quick to Make: Each little acorn can be completed in under an hour, perfect for when you need a quick and satisfying craft idea.
- Great for Home Decor: These charming acorns can be displayed around your home or used as seasonal decorations, adding a touch of warmth to your space.
- Perfect for Gifts or Holidays: Kids can create these acorns as handmade gifts for family and friends or to decorate for autumn and other seasonal celebrations.
- Easy to Customize: Little Acorns can be painted or accessorized in various ways, allowing your child to express their creativity.
PROJECT DETAILS
Skill Level
Beginner-Friendly: This craft suits beginners and children with minimal adult guidance, making it great for families.
Estimated Time
30 Minutes to 1 Hour: Depending on the number of acorns made, this project can be completed relatively quickly.
Approximate Cost
$5 – $10: The cost will depend on whether you have some materials already. Most are extremely affordable.
Best For
Kids and Adults: This craft is suitable for all ages and can also serve as a fun activity for playdates or family gatherings.
Project Type
Crafts for Beginners: A simple and engaging project that encourages creativity.
TOOLS AND EQUIPMENT NEEDED
Scissors
Scissors are essential for cutting materials cleanly and safely. If younger children are involved, ensure adult supervision when using scissors.
Glue
A good craft glue (such as white glue or hot glue) is necessary for assembling the acorns. A glue stick may also work for lighter materials.
Paintbrush (Optional)
If you plan to paint your acorns, a paintbrush helps apply paint evenly and allows for intricate designs.
MATERIALS
Acorn Caps
The caps from real acorns will form the top of your craft. Collect these in parks or during autumn walks.
Acrylic Paint
Acrylic paint is excellent for adding color to your acorns. It’s easy to apply and dries quickly.
Small Piece of Craft Foam or Felt
This serves as the body of the acorn, providing a nice base to glue the acorn cap onto.
Markers or Glitter (Optional)
Use markers for details or glitter for a shiny finish to enhance the creative DIY project.
String or Twine (Optional)
If you want to hang the acorns, you can use string or twine for added decorative flair.
HOW TO MAKE Little Acorn Craft
Creating the Little Acorn Craft is a fun and straightforward process. Follow these steps to make your acorns:
Step 1: Gather Your Materials
Start by gathering all your materials. Having everything ready will make the crafting process smoother and more enjoyable.
Step 2: Prepare the Base
Take a small piece of craft foam or felt and cut it into a rounded oval. This will be the body of your acorn. You can create different sizes for variety.
Step 3: Paint the Foam/Felt
Using acrylic paint, add color to your foam or felt piece. Natural colors like brown and tan work best to mimic real acorns but feel free to get creative!
Step 4: Attach the Acorn Cap
Once the paint is dry, apply a generous amount of glue to the top of the foam or felt oval. Press the acorn cap firmly onto the glued area to secure it in place.
Step 5: Add Finishing Touches
Once the glue has dried, use markers or glitter to add designs or faces on your acorns. This step is where your creativity can shine!
Step 6: Optional – Add String
If you’d like to hang your acorns, drill a small hole in the cap and thread a piece of twine or string through it. Tie a knot to secure it.
![Little Acorn Craft For Kids [Free Template]](https://cdn.contai.io/public/fal-ai-generated/1789832226_6aaeac2222cf8.png)
TIPS AND TRICKS
Here are a few helpful tips to enhance your Little Acorn Craft experience:
- Choosing Materials: Collect acorn caps that are not damaged to ensure a clean look for your creations. Avoid caps that are too small or too large compared to your foam base.
- Cutting and Gluing: Always cut crafts with adult supervision, especially for younger children. Squeeze out a small amount of glue to avoid messiness and give control.
- Avoiding Common Mistakes: Ensure the cap is secure before letting the acorn stand on its own. If it falls off, simply reapply glue and let it set for a longer time.
- Getting a Better Finish: Allow the paint to dry completely before attaching the cap. If you’d like a smoother finish, sand down any rough edges on your foam or felt.
- Decorative Details: Use a thin brush for finer details or apply stickers instead of painting them.
- Making the Craft Last Longer: To help increase durability, consider applying a thin layer of clear varnish once everything is complete.
- Working Safely: Ensure workspace is clean to avoid accidents. Cover surfaces while painting to prevent damage.
VARIATIONS AND CUSTOMIZATION IDEAS
Want to add your twist to the Little Acorn Craft? Here are some fun variations and customization ideas:
- Different Colors: Try different shades of paint to represent a variety of real acorns or even whimsical colors for a more fun, artsy design.
- Miniature Acorns: Scale down the size of the foam base and acorn caps for cute mini-acorn decorations.
- Seasonal Versions: Decorate the acorns for other seasons by using bright colors for spring or winter-themed colors like white and silver for a different seasonal look.
- Other Patterns: Use fabric instead of foam to create textured acorns and paint over fabric patterns for more depth.
- Personalized Versions: Write names or initials of friends or family members on them to create custom-made gifts.
- Group Projects: Encourage group participation by making a larger acorn family or collecting various sizes for a unique display.
![Little Acorn Craft For Kids [Free Template]](https://cdn.contai.io/public/original_images/AoSU7a7qX9HdhHTKCAJjY5KYY0y8Opp3IYij90P6.jpg)
Little Acorn Craft FAQ
How difficult is the Little Acorn Craft?
The Little Acorn Craft is a beginner-friendly craft that is very easy to follow and suitable for children with adult supervision.
What materials are needed for this project?
You will need acorn caps, craft foam or felt, acrylic paint, glue, and optional items like markers or string for decoration.
How should I store my finished acorns?
Store your finished acorns in a dry, cool place. If made delicately, keep them in a soft container to avoid crushing them.
Can I clean the acorns?
If your acorns get dusty, gently dust them with a soft cloth. Avoid using water as it may ruin paint.
How long does this craft take to complete?
The craft can take between 30 minutes to an hour, depending on how many acorns you make and the complexity of your designs.
CONCLUSION
The Little Acorn Craft is an easy and enjoyable DIY project perfect for kids and beginners. With simple materials and a quick process, it’s an excellent choice for seasonal decorations and handmade gifts. Not only is this project budget-friendly, but it also allows for unlimited creativity with your customization ideas. So, gather your materials, unleash your creativity, and transform these little acorns into delightful decorations!
We encourage you to try this creative DIY project and share your unique versions or experiences with us. Happy crafting!