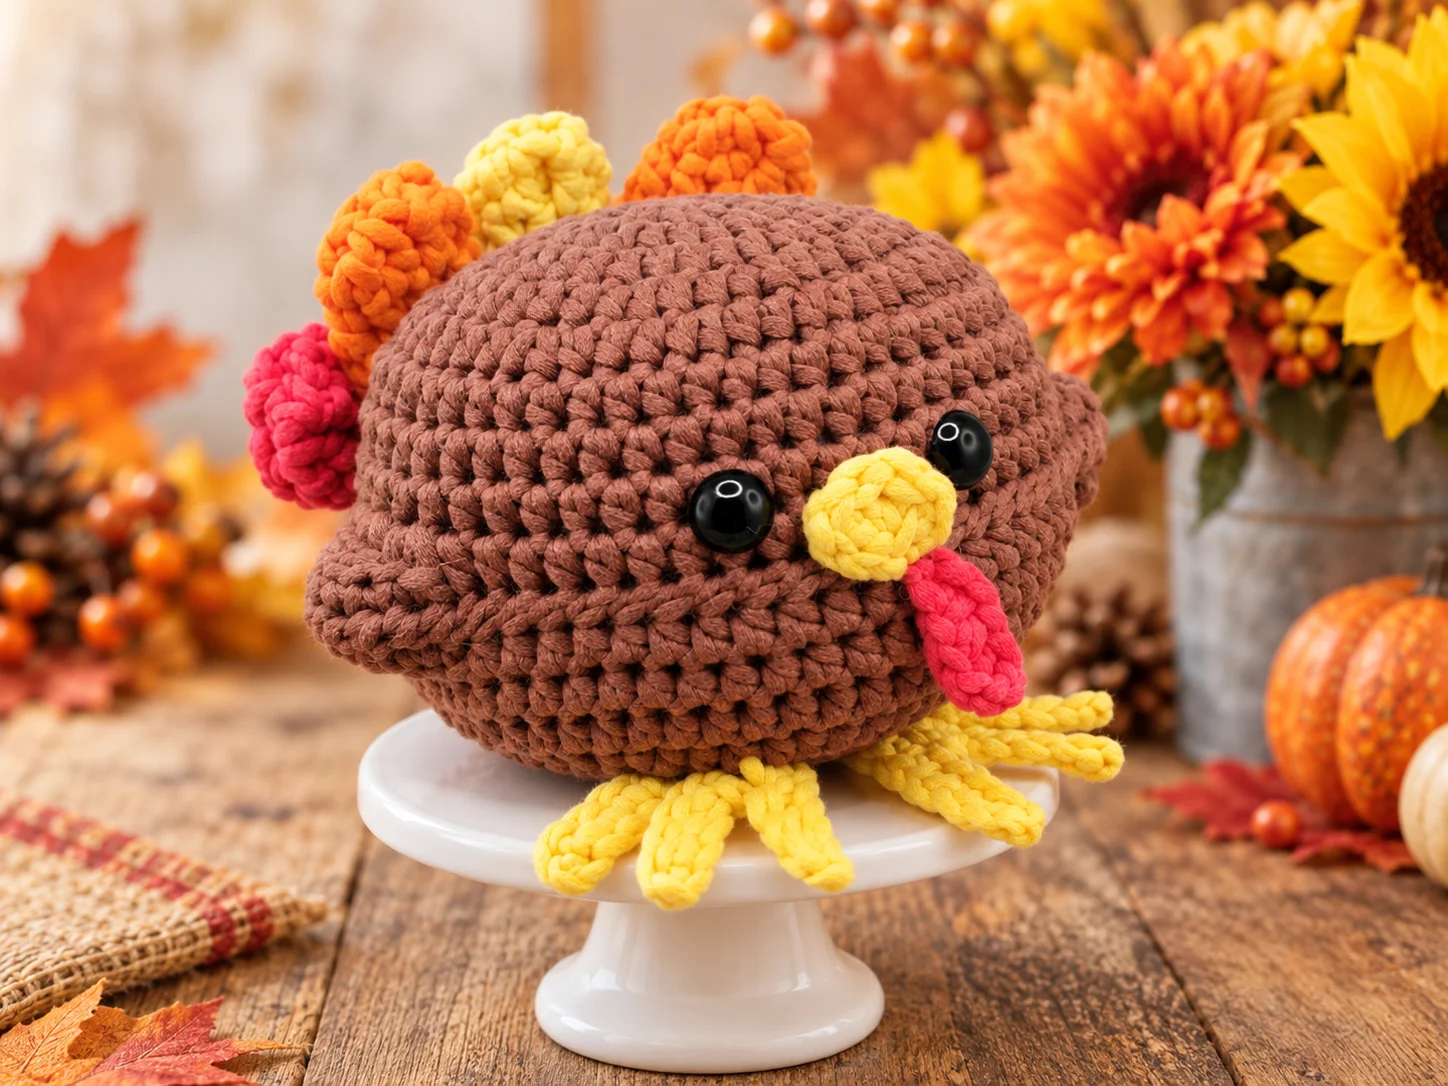
Add something handmade to your Thanksgiving decorations this year with an adorable mini crochet turkey pattern.
This cheerful little turkey combines a rounded brown body with bright fall-colored feathers, tiny yellow feet, a yellow beak, shiny eyes, and a red wattle.
The finished project measures roughly 4.5 inches, making it small enough for a tabletop or shelf but large enough to show off all of its cute crochet details.
It’s an especially fun project if you enjoy amigurumi but want something different from traditional bears, bunnies, and dolls.
Meet This Little Thanksgiving Turkey
The design is essentially a soft crochet squish transformed into a Thanksgiving turkey.
Instead of making a separate torso and head, the main body is formed from two matching rounded sections.
The pieces are joined around the edge and filled with fiberfill.
From there, the turkey gets its personality from the details.
A pair of small black eyes creates the face.
The yellow beak and red wattle immediately make it recognizable as a turkey.
Behind the body, five dimensional crochet feathers create a bright fan in classic Thanksgiving colors.
Finally, two playful yellow feet peek out from underneath.
Why Make a Mini Crochet Turkey?
Seasonal amigurumi projects are wonderful because they can be completed and displayed within the same season.
A small turkey like this can be used for much more than a toy.
Try making one for:
- Thanksgiving place settings
- Fall shelf displays
- Thanksgiving centerpieces
- Teacher gifts
- Hostess gifts
- Autumn craft fairs
- Office decorations
- Handmade gift baskets
Because the smaller pieces use only short lengths of yarn, this project can also help use up leftover yellow, orange, and red yarn.
Supplies for the Mini Turkey
Gather everything before starting so you can move smoothly through the project.
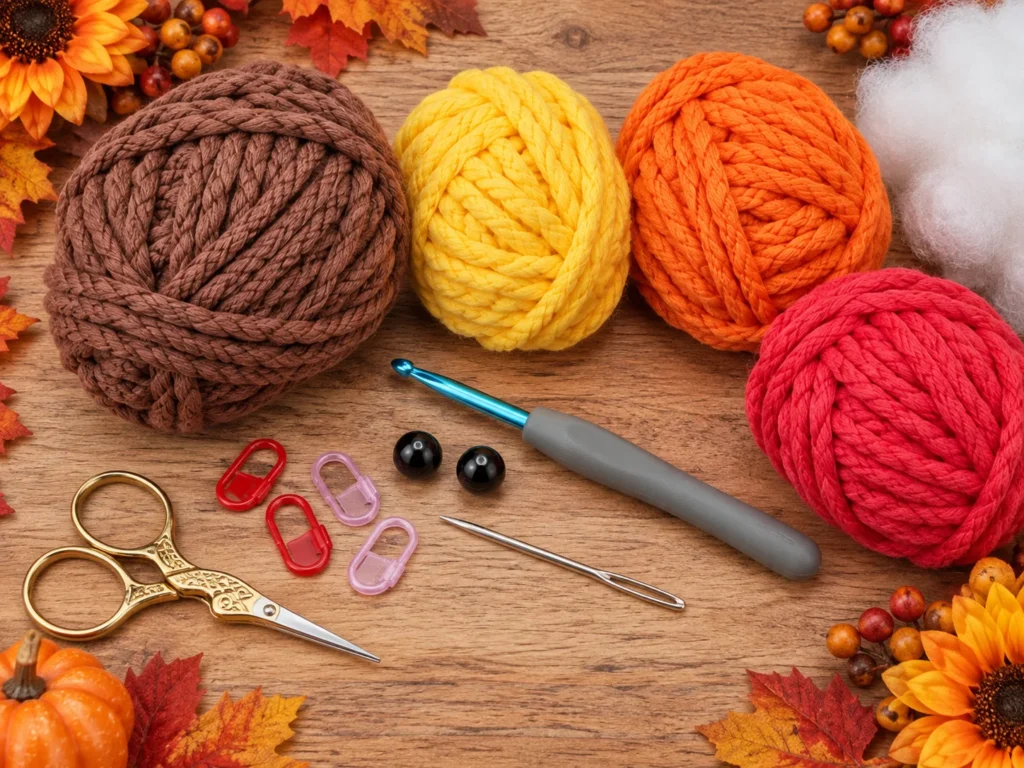
Yarn Requirements
Use approximately 105 yards of bulky #5 yarn.
You’ll need four main colors.
Brown
Approximately 60 yards.
This creates both halves of the turkey body.
Yellow
Approximately 15 yards.
Use it for the feet, beak, and center feather.
Orange
Approximately 15 yards.
Use orange for two of the tail feathers.
Red
Approximately 15 yards.
Red creates two feathers plus the wattle.
Tools and Notions
You’ll also need:
- 5 mm crochet hook
- Polyfill or fiberfill
- Two 14 mm safety eyes
- Stitch markers
- Yarn needle
- Scissors
- Pins
A blunt yarn needle is especially important because you’ll be sewing several pieces together during assembly.
Choosing Yarn
Bulky yarn gives this turkey its soft, substantial shape.
A cotton-blend bulky yarn provides visible stitch definition while maintaining enough softness for a plush project.
However, you can experiment with other yarns.
If you use a thinner yarn, expect the finished turkey to be smaller.
If you use super bulky or plush yarn, it will turn out larger.
Whatever yarn you choose, select a hook that produces relatively tight fabric so the stuffing stays hidden.
Finished Measurements and Gauge
The completed turkey measures approximately:
4.5 inches high and 4.5 inches wide, excluding the feet and feathers.
A useful gauge checkpoint is the body after the third round.
At that stage, the circle should measure roughly 2.75 inches across.
Don’t worry if your measurement is a little different.
For amigurumi, consistent stitch tension and a firm fabric are often more important than perfect gauge.
Techniques Used
This project combines basic and intermediate crochet techniques.
You’ll use:
- Magic ring
- Chains
- Slip stitches
- Single crochet
- Half double crochet
- Double crochet
- Increases
- Decreases
- Working in continuous rounds
- Seaming
- Amigurumi assembly
The turkey also uses linked crochet stitches to shape portions of the body.
Keep Track of Your Rounds
Both body halves are worked primarily in continuous rounds.
This means you don’t join at the end of every round unless instructed.
Place a stitch marker into the first stitch of the round.
When you reach the marker again, move it into the first stitch of the next round.
This simple method keeps the spiral construction organized.
First Step: Crochet the Lower Body
Begin with brown yarn.
The lower body starts from the center and expands outward.
Regular increases create a broad circular base.
After reaching the correct width, work additional rounds to build height.
The final shaping produces gentle side extensions that contribute to the turkey’s rounded silhouette.
Fasten off and weave in the starting yarn end.
Second Step: Crochet the Upper Body
Make another brown section for the top.
The construction is very similar to the lower body.
The top piece eventually becomes the front of the turkey and supports the facial features.
Do not cut the finishing yarn too short.
A long yarn tail will be useful during final assembly.
Creating the Turkey Face
The face contains only three components, but their placement makes a big difference.
You’ll need:
- Two eyes
- One yellow beak
- One red wattle
Place the eyes first.
Aim for even spacing.
Then temporarily position the beak between them.
The wattle should sit below and slightly beside the beak.
Once you are satisfied with the arrangement, attach everything securely.
How to Crochet the Beak
The beak is a tiny crochet piece made using yellow yarn.
It starts with a short chain.
Several stitches worked into one point create a small rounded wedge.
The piece only takes a few minutes to make.
Leave the final yarn tail intact so you can sew it directly onto the turkey.
How to Crochet the Wattle
Switch to red yarn.
The wattle starts with a short chain.
Working stitches of different heights down the chain produces a tapered decorative piece.
When attached below the beak, the wattle hangs naturally against the front of the body.
Making the Yellow Turkey Feet
The two feet are among the cutest details in the pattern.
They begin as chains and develop into branched toe shapes.
Make two matching feet.
Before attaching them, rotate one so the pair mirrors correctly.
Sew them securely to the underside of the turkey while leaving the toe sections free.
That allows the feet to sit naturally rather than lying completely flat against the body.
Making the Colorful Tail
The tail consists of five individual crochet feathers.
For the traditional color arrangement, make:
- Two red
- Two orange
- One yellow
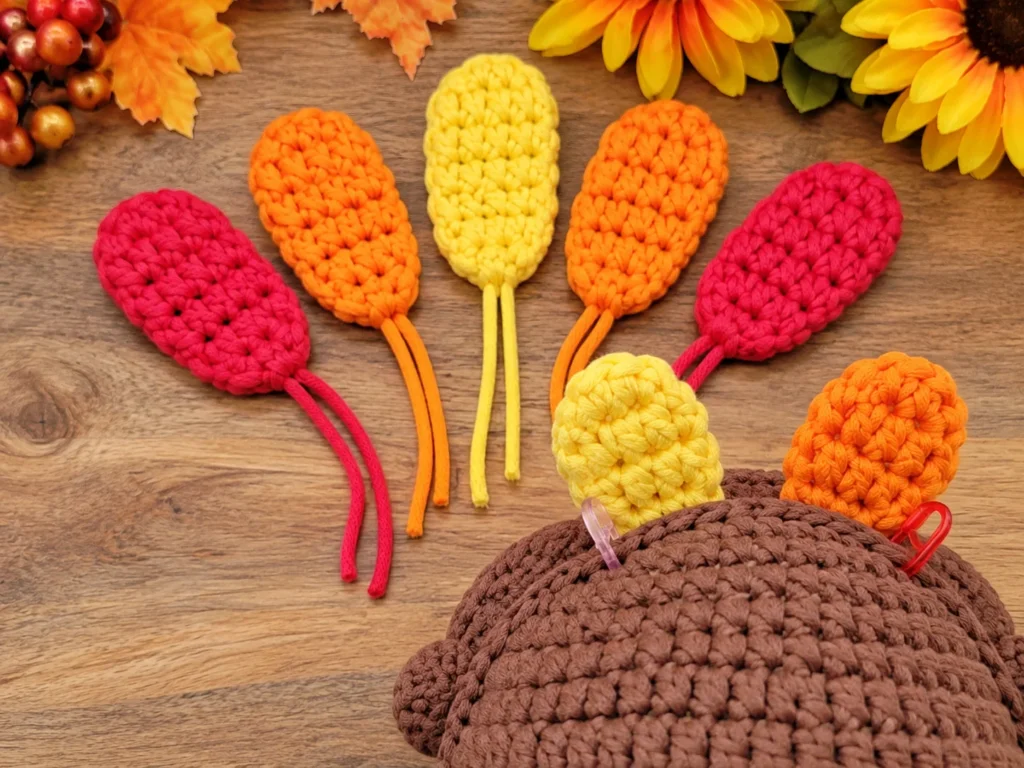
Each feather is worked as a small dimensional crochet piece.
The center stays wider while decreases near the end create a rounded tip.
Fasten off with enough yarn left for sewing.
Arrange the Feathers Before Sewing
Don’t attach each feather immediately after making it.
Finish all five first.
Then lay them out behind the body.
Arrange them:
Red | Orange | Yellow | Orange | Red
The center yellow feather should point mostly upward.
Angle the orange feathers slightly outward.
The two red outer feathers can spread farther toward the sides.
Pin everything in place and inspect the arrangement from the front.
If it looks balanced, begin sewing.
Final Turkey Assembly
Assembly can seem complicated when you see all the separate crochet pieces, but it becomes much easier when completed in stages.
Attach the Eyes
Secure the eyes to the upper body.
Attach the Feet
Sew both feet to the lower body.
Add the Wattle
Position the wattle near the center front.
Add the Tail
Sew the five feathers across the rear section.
Join the Body Halves
Place the upper and lower body sections together and begin whip stitching.
Stop when there is still a large opening.
Sew on the Beak
Attach the beak between the eyes.
Add Stuffing
Fill the turkey gradually with fiberfill.
Push stuffing gently into the edges and side areas so the body remains evenly shaped.
Close the Opening
Continue sewing until the body is completely closed.
Secure the yarn and weave the end inside.
How Much Stuffing Should You Use?
The ideal turkey should feel soft and squishy while still holding its shape.
Too little stuffing can make the body look deflated.
Too much stuffing can stretch the stitches and make the seam harder to close.
Add fiberfill little by little.
Gently squeeze the turkey between additions to check the shape.
Customizing Your Turkey
One of the easiest ways to personalize this project is with color.
Classic Thanksgiving
Chocolate brown, pumpkin orange, golden yellow, and cranberry red.
Vintage Fall
Caramel, mustard, brick red, and muted orange.
Neutral Farmhouse
Beige, cream, tan, rust, and soft brown.
Rainbow Turkey
Make every feather a different color.
This version is particularly fun for children or for using scrap yarn.
Turn It Into Thanksgiving Décor
Your finished crochet turkey doesn’t have to live in a toy box.
Try displaying it with:
- Mini pumpkins
- Crochet leaves
- Fall garlands
- Thanksgiving signs
- Wooden beads
- Autumn flowers
- Crochet pumpkins
Because the turkey is compact, it works particularly well on tiered trays and shelves.
Mini Crochet Turkey Pattern FAQ
How long does this project take?
The exact time depends on experience, but the small size makes it considerably faster than many larger amigurumi projects.
Is bulky yarn required?
No, but changing the yarn weight will change the finished dimensions.
Can the turkey be made without safety eyes?
Yes. You can embroider the eyes using black yarn or embroidery thread.
How many feathers do I need?
Five.
Use one center feather and two matching pairs around it.
What size crochet hook is recommended?
A 5 mm hook works well with the suggested bulky yarn.
Is the body worked in joined rounds?
Most of the body is worked continuously in a spiral rather than joining every round.
Can I make several for Thanksgiving table settings?
Definitely. Their small size makes them suitable for place settings, tabletop decorations, or handmade Thanksgiving favors.
A Small Project With Lots of Fall Personality
This mini crochet turkey pattern is a charming addition to your autumn crochet list.
The project is small enough to feel manageable but includes enough variety to stay interesting from beginning to end.
You’ll crochet circles, shape a stuffed body, make dimensional feathers, create tiny feet, and practice sewing amigurumi parts together.
Best of all, once the final seam is closed, you’ll have a cheerful little turkey ready for Thanksgiving.
Make the traditional version in brown, orange, yellow, and red, or experiment with your own favorite fall palette to create a turkey that perfectly matches your seasonal décor.