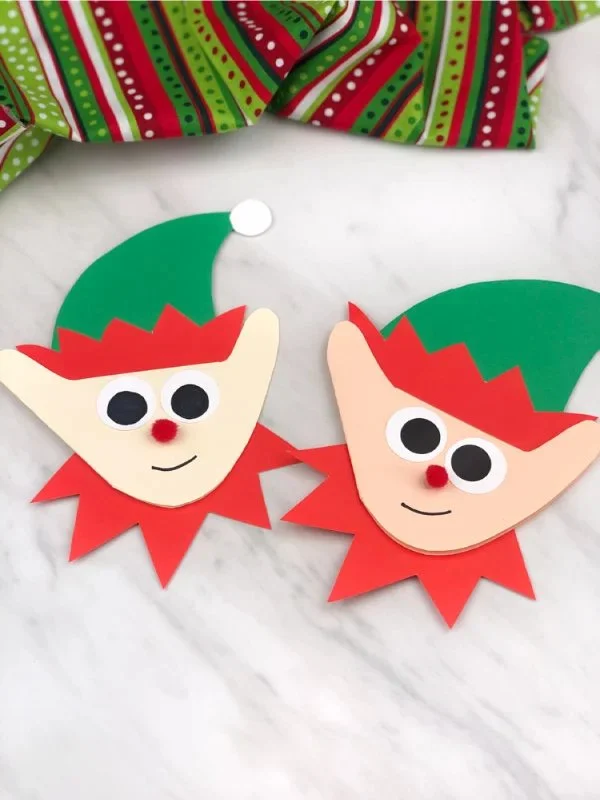
Are you looking for a delightful and simple holiday craft project to do with your kids? The Elf Handprint Christmas Card for Kids is the perfect easy DIY craft! This engaging project is not only creative but also allows for a personal touch, making it a memorable keepsake for the holiday season. In this article, we will guide you through this beginner-friendly craft, detailing the materials needed, step-by-step instructions, and tips to ensure you have a fun crafting experience.
WHY YOU WILL LOVE THIS Elf Handprint Christmas Card
Making the Elf Handprint Christmas Card is an enjoyable activity that you and your kids will love for several reasons:
- Easy for beginners: This craft uses simple, straightforward techniques, making it accessible for everyone.
- Uses simple materials: Most materials you need are items you probably already have at home.
- Budget-friendly: This project is an affordable way to create personalized holiday cards.
- Quick to make: You can complete this craft in under an hour, making it a great option for busy holiday schedules.
- Great for gifts: These handmade cards can be cherished keepsakes for family and friends.
- Easy to customize: Add your own artistic flair with variations and personal touches as desired.
By making this festive card, you create not just a craft but also a fun family memory!
PROJECT DETAILS
Skill Level
This project is ideal for beginners. Kids can easily follow along with adult supervision, making it a perfect family activity.
Estimated Time
The Elf Handprint Christmas Card project takes about 30-45 minutes, depending on your child’s dexterity.
Approximate Cost
The materials required are budget-friendly, costing around $5 to $10 total if you need to purchase supplies.
Best For
This craft is best for kids aged 3 and up, making it an excellent choice for preschoolers.
Project Type
This is a festive holiday craft that doubles as a card and keepsake, ideal for the Christmas season.
TOOLS AND EQUIPMENT NEEDED
Scissors
You’ll need a pair of scissors to cut the card stock and templates. For younger children, adult supervision is recommended during this step.
Glue Stick
A glue stick is necessary for attaching different card elements to ensure everything stays in place.
Pencil
Use a pencil for tracing your child’s hand on the card stock. It’s easy to erase if needed before finalizing.
MATERIALS
Colored card stock in skin color
This card stock will be used to create the elf’s handprint, giving the card a personal touch.
Red card stock
Use this to create the elf hat, adding a festive color to your card.
Green card stock
The green card stock forms the main part of the elf’s hat.
White card stock
This will be used to create the trim and pom-pom on the elf’s hat, giving it a festive finish.
Small red pom pom
Add this as the nose for your elf, bringing some 3D texture to your card.
Black marker
A black marker is used for drawing on the eyes and smile, adding personality to your elf!
Glue stick
The glue stick will help attach various elements securely.
Elf handprint card template
Use this printable template to guide the construction of your card.
![Elf Handprint Christmas Card For Kids [Free Template]](https://cdn.contai.io/public/fal-ai-generated/1789832247_6aaeac3706200.png)
HOW TO MAKE Elf Handprint Christmas Card
Follow these simple steps to create your Elf Handprint Christmas Card.
Step 1: Download the template
Download the elf handprint card template, print it, and cut out the pieces using your scissors.
Step 2: Create the handprint
Take a piece of skin-colored card stock and fold it in half ‘hamburger’ style. Position your child’s left hand along the folded edge so the pinky aligns with the fold. Trace the handprint with a pencil and cut around the outline, leaving the fold intact.
Step 3: Assemble the elf’s hat
Begin by gluing the red hat trim to the bottom of the green card stock hat piece. Ensure it is aligned properly for a clean look.
Step 4: Complete the hat
Take the small white pom-pom and glue it to the tip of the red hat to create the elf’s hat top.
Step 5: Attach the hat
Place the completed elf hat on top of the three middle fingers of the handprint, leaving the thumb and pinky above the hat. Glue the hat in place.
Step 6: Trim excess paper
If there’s any excess paper sticking out from behind the hat, carefully trim it off using your scissors for a neat appearance.
Step 7: Add the eyes
Glue the eyes just below the hat, ensuring they are positioned symmetrically for a cute look.
Step 8: Draw on a smile
Using your black marker, draw a simple smile beneath the eyes to give your elf a friendly expression.
Step 9: Add the nose
Stick the red pom-pom on with some glue or a glue dot right below the eyes for a fun touch.
Step 10: Attach the neck trim
Cut a small strip of paper from the white card stock to create the elf’s collar. Place this strip behind the handprint and glue it in place.
![Elf Handprint Christmas Card For Kids [Free Template]](https://cdn.contai.io/public/original_images/9EFFqA6vHLcPtcJR76yPrTFUvgtG4W7acp6uTQsp.jpg)
TIPS AND TRICKS
-
Choosing materials: Opt for card stock that is easy to find and lightweight for ease in cutting.
-
Cutting and gluing: Make sure the glue is applied evenly to avoid gaps. Ensure kids don’t apply too much glue to avoid mess.
-
Common mistakes: Double-check hand placement on the folded part to create a true handprint.
-
Finishing touches: Allow the glue to dry thoroughly before handling or displaying your card to prevent smudging.
-
Saving money: Create multiple cards at once for family and friends. You can use leftover materials to create more.
-
Durability: Be gentle when handling the finished card, as the pom pom and glued parts can come loose if mishandled.
VARIATIONS AND CUSTOMIZATION IDEAS
Here are some fun ways to customize your Elf Handprint Christmas Card:
-
Different colors: Use different color card stocks for the hat and trim, or create a rainbow effect for a colorful elf.
-
Different sizes: Try using a larger or smaller hand for different card sizes, making them suitable for various recipients.
-
Seasonal versions: Transform this craft into a holiday-themed card for other seasons by changing the design elements, like adding flowers for spring.
-
Personalized messages: Write a personal message inside the card for a more heartfelt touch.
-
Add embellishments: Include glitter, stickers, or drawings to make your design pop even more.
Elf Handprint Christmas Card FAQ
What materials do I need?
You will need colored card stock in skin color, red, green, and white, small red pom-poms, a black marker, glue, scissors, a pencil, and an elf handprint card template.
How hard is it to make this card?
This craft is designed for beginners and is easy to follow. Kids can help with tracing and gluing, making it a family-friendly project.
How long does it take to complete?
The project typically takes about 30-45 minutes, depending on your child’s age and cutting skills.
Can the finished card last a long time?
Yes, if constructed carefully, the card can last for many seasons as a cherished keepsake.
How can I customize this craft?
You can change the colors, add personal messages, embellish with stickers or glitter, and create different sizes using various handprints.
CONCLUSION
The Elf Handprint Christmas Card is a delightful, easy craft that brings creativity and joy to the holiday season. It’s great for kids and delivers a heartfelt, handmade gift that family and friends will cherish. With simple materials and straightforward steps, it is truly a beginner-friendly craft. So gather your supplies and create some holiday magic today! We would love to see your finished projects and hear about your customization ideas—share your creations with us!