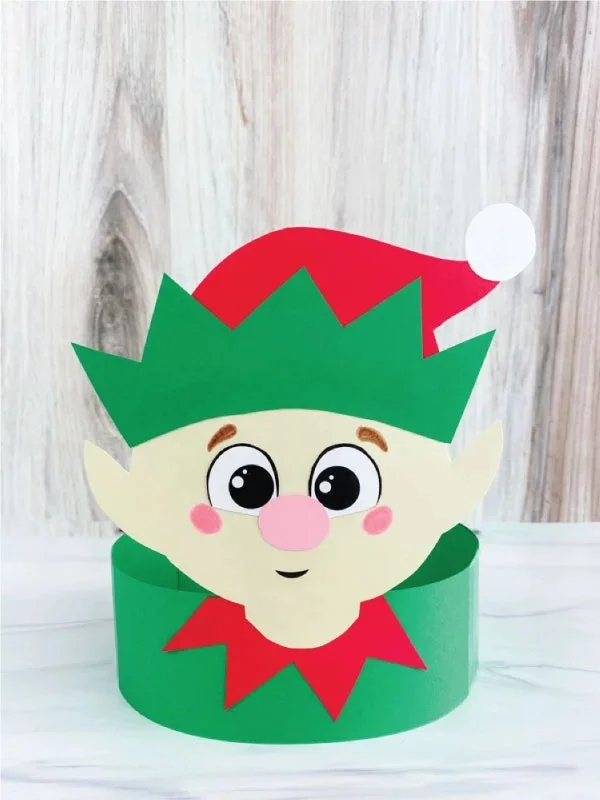
Crafting a homemade elf headband is an ideal way to bring holiday cheer to your festivities. This easy craft is perfect for kids and adults alike, making it a delightful DIY project for parents and those seeking simple craft ideas. Using easily accessible materials, this budget-friendly craft can be customized to fit any holiday theme. Best of all, it’s a fun way to create DIY decorations that bring joy during the festive season!
WHY YOU WILL LOVE THIS Elf Headband
Making an elf headband is a fantastic way to celebrate the holiday season with a simple craft that everyone can enjoy. Here are several reasons why this easy DIY project is perfect for you:
- Easy for beginners: This craft involves no complicated techniques, making it suitable for kids and novice crafters.
- Uses simple materials: You likely already have many of the items needed at home, keeping costs low.
- Budget-friendly: It’s a cost-effective project that won’t break the bank, perfect for family activities.
- Quick to make: You can create these delightful headbands in no time, allowing for more festive fun.
- Great for holidays or seasonal decorating: These headbands are perfect for Christmas and other festive occasions.
- Easy to customize: The craft can be tailored with different colors, patterns, and embellishments, making it a fun creative outlet.
PROJECT DETAILS
Skill Level
Beginner – This project is simple and suitable for all ages.
Estimated Time
Approximately 30 minutes – It’s a quick craft that allows for immediate enjoyment.
Approximate Cost
$5-10 – Most materials are affordable and may already be on hand, keeping your budget intact.
Best For
Kids and families – A great way to engage children in holiday crafts.
Project Type
Holiday Crafts – Ideal for festive occasions, parties, or simply to get into a joyful spirit.
TOOLS AND EQUIPMENT NEEDED
Scissors
Used for cutting felt and other materials.
Hot Glue Gun
For securely attaching elements of the headband together.
Ruler
Helps in measuring lengths of materials accurately.
MATERIALS
Felt Fabric
This colorful fabric will be the base for your elf hat and ears. It’s soft, easy to cut, and comes in many colors.
Headband
A plain plastic or fabric headband will serve as the base structure for your elf headband.
Craft Glue
A quick-drying glue or a hot glue gun will help securely hold your pieces together.
Pom Poms
Small pom poms are ideal for adding fun embellishments to the tips of your elf ears or the hat.
Glitter or Sequins (optional)
For a bit of sparkle, throw in some glitter or sequins to customize your craft further.
Marker
This can be used to draw shapes or patterns if you want to personalize the design.
HOW TO MAKE Elf Headband
Step 1: Prepare Your Materials
Start by gathering all your materials in one spot. Arrange them in a way that makes them easy to access.
Step 2: Cut the Felt
Cut the felt into the shapes you need for the elf ears and hat. For the ears, make two triangle shapes, and for the hat, cut a triangle that’s large enough to fit on the headband.
Step 3: Assemble the Ears
Take the triangle ear shapes and use a bit of glue to attach the edges. Allow them to dry securely. You may also add embellishments like pom poms or sequins at this stage.
Step 4: Create the Elf Hat
Fold the larger piece of felt into a cone shape and glue it securely. You can add tassels or pom poms to the tip of the hat to give it a festive look.
Step 5: Attach Ears and Hat
Using your hot glue gun, carefully attach the elf ears and the hat to the headband. Ensure they are securely fastened, so they stay in place while being worn.
Step 6: Customize
This is the fun part! Use glitter, sequins, or markers to add your personal touch to the elf hat and ears. Let your creativity shine!
Step 7: Let Dry
Allow the glue to dry completely before wearing your new elf headband.
![Elf Headband Craft For Kids [Free Template]](https://cdn.contai.io/public/fal-ai-generated/1789832251_6aaeac3b5e180.png)
TIPS AND TRICKS
- Choosing materials: Opt for felt because it’s easy to cut and won’t fray. Choose vibrant colors that resemble classic elf themes.
- Cutting: Use sharp scissors for clean edges. If you’re crafting with little ones, help them with more intricate cuts.
- Avoiding common mistakes: Ensure your glue isn’t too hot if working with children, as this can cause burns.
- Getting a better finish: Use a ruler to measure your cut shapes for symmetry and balance. This adds a polished look to your craft.
- Saving money: Upcycle materials like old headbands or unused felt from previous projects instead of purchasing new materials.
- Making the craft last longer: Take care when wearing the headband to avoid bending it. Store in a cool, dry place to keep its shape.
VARIATIONS AND CUSTOMIZATION IDEAS
- Different Colors: Use various colored felt to represent different holiday traditions or simply to match your style.
- Different Sizes: Adjust the dimensions of the ear shapes or hat for smaller or larger headbands.
- Seasonal Versions: Create adaptations for other holidays, like a bunny headband for Easter or pumpkin decor for Halloween.
- Different Patterns: Decorate the felt with stripes or polka dots using fabric paint for added fun.
- Personalized Versions: Let kids draw their names or festive symbols on the headband for a unique touch.
![Elf Headband Craft For Kids [Free Template]](https://cdn.contai.io/public/original_images/8jAOjmy3NjBZtdOjFGPvodgN5xCQoyt8L3ZV9cAN.jpg)
Elf Headband FAQ
Q1: How difficult is this craft to make?
This is a beginner-friendly craft that is easy for anyone to create. Kids can have fun while learning some crafting basics with adult supervision.
Q2: What materials do I need?
You’ll need felt fabric, a headband, glue, scissors, and optional embellishments like pom poms or glitter. Most of these materials are easy to find and budget-friendly.
Q3: Can I store the finished headband?
Yes, store it in a cool and dry place to maintain its shape. Avoid bending it too much, and it should last through many seasons.
Q4: How long does it take to make the headband?
This project takes about 30 minutes, making it a quick and enjoyable craft, especially for holiday gatherings.
Q5: Can I clean the headband?
If it gets dirty, gently wipe it with a damp cloth. Avoid soaking it in water to preserve its shape and materials.
CONCLUSION
Creating an elf headband is an easy, budget-friendly DIY project that’s perfect for the holiday season. With simple materials, this beginner-friendly craft is a great way to spread joy during festive times. The customization options allow you to express creativity and make it a unique accessory for yourself or as a lovely handmade gift for friends and family. We encourage you to try this fun craft and share your experiences or customization ideas with others! Happy crafting!