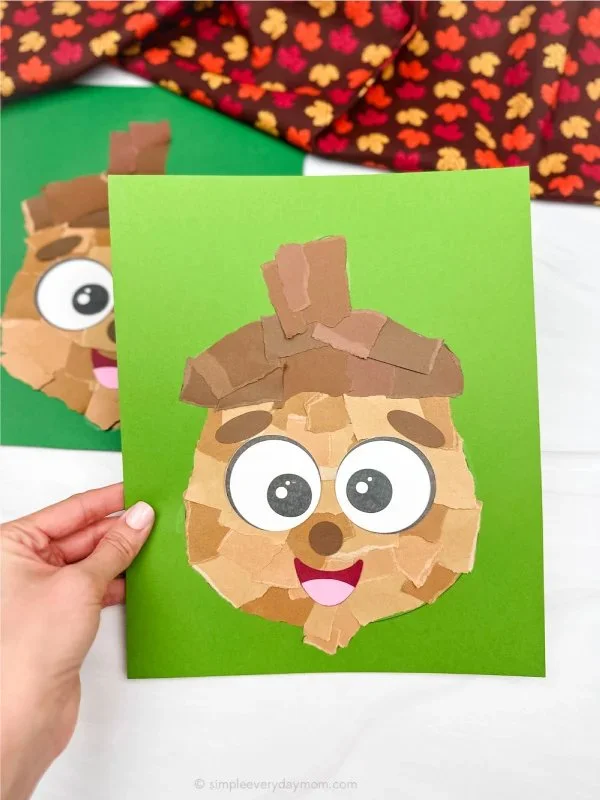
If you’re looking for an easy craft project to do with kids, the Torn Paper Acorn Craft is a fun and creative DIY idea that everyone will enjoy. This easy DIY project uses simple materials and is perfect for beginners. Whether you want to create a homemade decoration or a fun seasonal craft, this project will get the kids involved while enhancing their fine motor skills. Plus, it allows for plenty of customization, making it a versatile activity for any occasion.
WHY YOU WILL LOVE THIS Torn Paper Acorn Craft
This Torn Paper Acorn Craft is a fantastic project for several reasons:
- Easy for Beginners: This craft is perfect for kids and novice crafters, making it an ideal beginner-friendly craft.
- Uses Simple Materials: The materials required are easy to find and inexpensive, perfect for a budget-friendly DIY experience.
- Quick to Make: You can complete this project in a short time, making it ideal for a weekend craft session.
- Great for Home Decor: Use your finished acorns to decorate your home for fall or any other season.
- Great for Gifts: These handmade acorns make perfect gifts for family and friends.
- Seasonal Decorating: Acorns symbolize fall, making them great for seasonal decorations.
- Easy to Customize: Kids can personalize their acorns with different colors and patterns.
PROJECT DETAILS
Skill Level
Beginner – This craft is simple and straightforward, making it suitable for all skill levels.
Estimated Time
Approximately 30-45 minutes – This project can be completed quickly, allowing for fun without taking up too much time.
Approximate Cost
Budget-friendly – Most materials can be found around the house or purchased for under $10.
Best For
Kids and families – This craft is perfect for family bonding and can be done at home or in schools.
Project Type
DIY craft project – This project fits perfectly into the DIY category for seasonal crafts, home decor, or gifts.
TOOLS AND EQUIPMENT NEEDED
Scissors
Scissors are essential for cutting the torn paper into the desired shapes. Be sure kids use safety scissors for added safety.
Glue Stick or Liquid Glue
Glue will hold the torn paper pieces together to create the acorn shape. A glue stick is preferable for easy application and less mess.
Paper Plate
A paper plate can serve as a handy workspace for keeping torn pieces of paper and glue. It also allows for easy cleanup.
MATERIALS
Colored Construction Paper
Colored construction paper is the main material for this project, providing a vibrant base for the acorns.
Brown or Tan Paper
Using brown or tan paper adds a natural texture to the acorns, mimicking real acorn caps.
Optional: Decorative Elements
You may want to have glitter, markers, or stickers available to personalize the acorns even more.
Pencil
A pencil is useful for drawing outlines if needed, especially to guide younger kids.
![Torn Paper Acorn Craft For Kids [Free Template]](https://cdn.contai.io/public/fal-ai-generated/1789832249_6aaeac394c4d9.png)
HOW TO MAKE Torn Paper Acorn Craft
This section outlines the steps to create your Torn Paper Acorn Craft.
Step 1: Gather Your Materials
Collect all your materials to have everything ready before you start. This includes construction paper, glue, scissors, and other optional decorative items.
Step 2: Tear the Paper
Take the colored construction paper and tear it into small pieces. This is a fun activity kids will enjoy, allowing them to use their hands and have an artistic flair. You can also guide them to create different sizes for added variety.
Step 3: Create the Acorn Cap
Using brown or tan paper, cut out a small circle or a rough acorn cap shape. This part can also be torn for a more textured appearance.
Step 4: Assemble the Acorn Body
Take your torn colored paper and start gluing the pieces onto your paper plate in a mound shape or an acorn shape. Encourage children to overlap the pieces for a unique look.
Step 5: Attach the Cap
After the acorn body is completed, glue the cap you made in step 3 on top of the acorn body. Make sure it sticks well.
Step 6: Personalize Your Acorn (Optional)
If desired, decorate your acorn with additional elements like glitter, stickers, or draw on faces and patterns using markers. Each kid can make their acorn unique.
Step 7: Allow to Dry
Let your acorns dry completely. Be patient, as this step is essential for the overall durability and finish of the craft.
TIPS AND TRICKS
Here are some practical tips to make your Torn Paper Acorn Craft even easier and more fun:
- Choosing Materials: Use a variety of colors to make vibrant acorns; be bold and creative with your color choices.
- Cutting and Tearing: Not all pieces need to be the same size; varying sizes can lead to a more interesting final product.
- Avoid Common Mistakes: Make sure to use enough glue to secure the torn pieces together, as dry areas can lead to the craft coming apart.
- Making Assembly Easier: For younger kids, pre-tearing the paper can save time and make it easier for them to get started.
- Enhancing Durability: You can use a coat of clear drying glue or mod podge on top for extra durability.
- Storing: Once dried, store your acorns in a cool, dry place so they maintain their shape and design.
VARIATIONS AND CUSTOMIZATION IDEAS
Here are some fun ideas to customize your Torn Paper Acorn Craft:
- Different Colors: Use various colors for the acorn body and cap, like orange or yellow, for a vibrant fall display.
- Different Sizes: Experiment with making larger or smaller acorns for varied decorations.
- Recycle Old Paper: Use newspaper or recycled paper for a textured look while being eco-friendly.
- Seasonal Versions: Decorate acorns with holiday-themed colors or add tiny holiday accents.
- Personalized Versions: Create acorns that include the child’s name or initials using playful fonts or stickers.
![Torn Paper Acorn Craft For Kids [Free Template]](https://cdn.contai.io/public/original_images/UajPcL8e8YzLeBDpkhni14T8NtDwnzVhoNHInHOM.jpg)
Torn Paper Acorn Craft FAQ
1. Is this craft difficult to make?
No, this Torn Paper Acorn Craft is a beginner-friendly craft that is easy for kids to follow. The steps are simple, making it great for all skill levels.
2. How long does it take to complete this craft?
You can complete this craft in about 30-45 minutes, depending on how much personalization you choose to do.
3. What materials do I need for the craft?
You’ll need colored construction paper, brown or tan paper for the acorn cap, scissors, glue, and optionally decorative elements like glitter or stickers.
4. Can these acorns be used for seasonal decorations?
Yes! The acorns are perfect for home decor, especially in the fall, and can also be used for holiday decorations.
5. How should I store the finished acorns?
Store the finished acorns in a cool, dry place to keep their shape and prevent them from getting damaged.
CONCLUSION
The Torn Paper Acorn Craft is a simple and enjoyable DIY project that is perfect for kids and families. Easy to make and customizable, this beginner-friendly craft is great for home decor or seasonal decorations. Plus, the use of basic materials means that it is budget-friendly, making it a fantastic activity for anyone, regardless of crafting experience. We encourage you to gather your materials, follow the steps, and share your finished acorn masterpieces or any creative variations you come up with! Happy crafting!